How to update DNS records

First things first: What is DNS?
DNS stands for Domain Name System. It is a system that translates human-readable domain names (such as www.example.com) into computer-readable IP addresses (such as 192.0.2.1). When you type a domain name into your web browser, your computer contacts a DNS server to find out the IP address for that domain name.
DNS servers act like a phone book for the internet. When you type in a domain name, your computer will first reach out to a DNS server to look up the IP address associated with that domain name. The DNS server will then give your computer the IP address, and your computer can then load the website associated with that IP address. The whole process happens in just a fraction of a second.
It's also important to understand the two main types of DNS records: A and CNAME. A records are used to point a domain or subdomain to an IP address. CNAME records are used to alias one name to another. For example, you could use a CNAME record to point www.example.com to example.com.
How to add or update DNS records
Now that we know what DNS is and how it works let us get into how you can add or update DNS records for your domain. Updating your DNS records usually involves two steps: first, you will need to log in to where your domain is registered (this is called your ‘domain registrar’) and find the area where you can manage your DNS settings. Secondly, you will need to modify or add the desired record using the provided fields. Keep in mind that depending on where your domain is registered, the specific steps may be slightly different.
We will use Cloudflare as an example; here is what you will need to do:
Step 1: Log in to your account
The first step is to log in to the account where you manage your DNS records. This is typically your domain registrar or web hosting company.
Step 2: Find the DNS management page
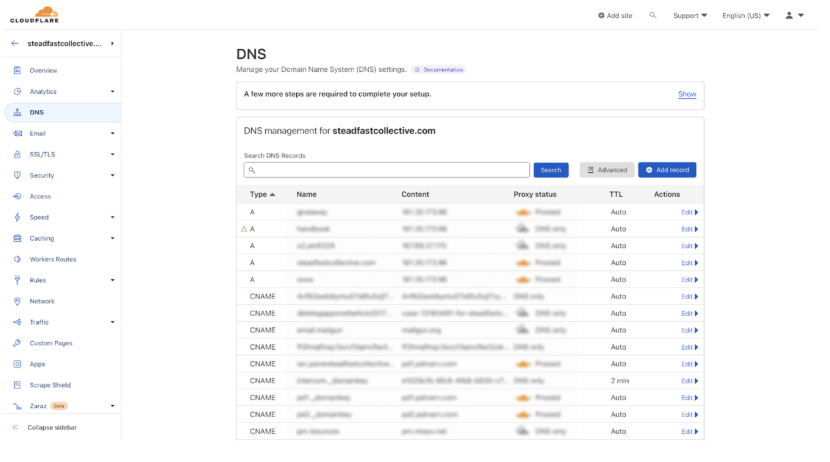
Once you are logged in, look for a page called ‘DNS management’, ‘DNS Settings’, or something similar. This is where you will make changes to your DNS records. You will usually find a page under your domain name. On Cloudflare, it looks like this:
Step 3: Add/Update an A record
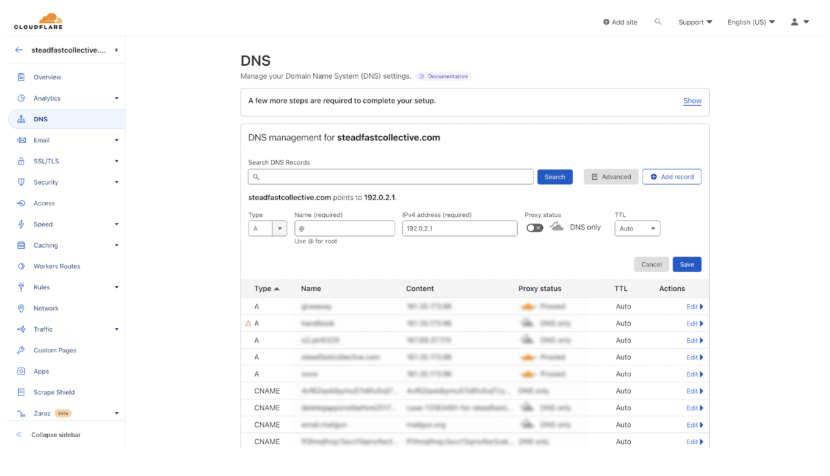
Find the ‘Add Record’ button and click to open the form. You can then choose the type of record you want to add - in this example, we are adding an A record. We are using @ which means it is the root domain (steadfastcollective.com), and we add an IP address. If you need to update a record, you can just click the ‘Edit’ button and update the value.
Adding or updating your domain's DNS records is a pretty simple process, but it is important to note that changes can take up to 24-48 hours to go into effect. We hope this step-by-step guide was helpful in walking you through how to add or update DNS records for your domain name.
If you would like to know more about how to manage DNS records for other providers, see the links below for some of the popular providers:
More Articles

Why Statamic for Membership Platform
Why Statamic works brilliantly as a membership platform for large organisations. Flexible, secure, and built on Laravel.

Laravel for Agentic Development
If you're a founder, CTO, or product manager with a Laravel-powered platform, understanding what these are and what they make possible puts you in a much stronger position to make good decisions.

Eloquent explained: what it is and why it matters
Eloquent in plain English. What Laravel's ORM actually does, why your developers love it, and the questions to ask in your next project meeting.
